Houdini: Cutter + Renderman


return to main index


links


Using Cutter to write RenderMan shaders significantly decreases the complications of using RenderMan with Houdini. This page explains one way of setting up your system to use Cutter to write RenderMan shaders for use with Houdini. It is assumed you are using a Windows PC.


step 1

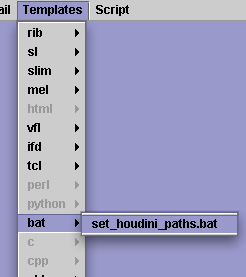
Use Cutter's Templates->bat menu to open a copy of the set_houdini_paths.bat document.Save the document in a location of your choosing.


The main part of the bat file is show below,

setx HOUDINI_PATH H:/;"&"
setx HOUDINI_VEX_PATH H:/SHOP/surface;H:/SHOP/displace;H:/SHOP/light;H:/SHOP/fog;H:/SHOP/shadows;"&"
setx HOUDINI_RI_SHADERPATH ".:&:$HFS/houdini/ri_shaders:H:/rman/shaders"


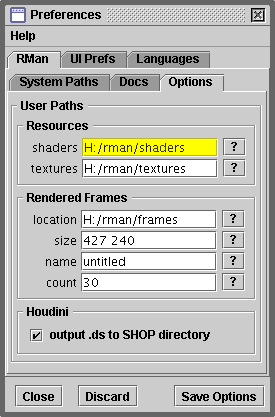
The items shown in bold are those that you may have to alter. In particular the path to the shaders directory (H:/rman/shaders) should match the Cutter preference shown on the right.

Cutter directs the shader compiler to place compiled shaders in this location. The source code for your shaders can be saved in any directory.


step 2

Create a directory named SHOP.

When Cutter directs the shader compiler to output a (.slo) shader it also invokes Houdini's rmands utility so that an appropriate .ds file is placed in the SHOP directory. Cutter also carries out additional customization of the SHOP directory so that your shader can be referenced from within Houdini.

The bat file shown above assumes your SHOP directory is located at,

    H:/SHOP


step 3 - create a sl document

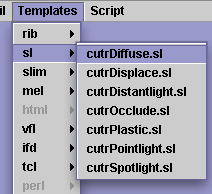
Choose Templates->SL->cutrDiffuse menu item. Save the document in any convenient directory. Using either the menu item Script->compile or the keyboard short-cuts ALT+e or CNTR+e compile the shader.

In your SHOP directory you should see a surface directory. Within this directory there should be a file named cutrDiffuse.ds - this assumes you did not change the name of your shader!


step 4 - testing the shader within Cutter

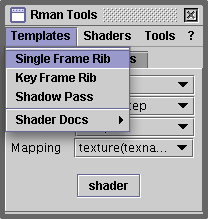
Ensure the shader source code window is at the front. Choose the Tools->Show Rman Tool menu item. Use the Templates menu from Rman Tools to select Templates->Single Frame Rib (see opposite).

Save and render the RIB file. You should see a plain white sphere.


step 5 - setting paths & launch Houdini

Double click the set_houdini_paths.bat file. Launch Houdini in the normal way.


step 6 - testing a shader within Houdini

In the shops window press the TAB key. After the popup menu appears type the first letter of the custom shader ie. "c". The cutrDiffuse shader previously compiled within Cutter should appear in the popup containing the names CHOP Network, CHOP2 Network.

Choose cutrDiffuse - the sphere in the modeling window will be rendered with the custom shader.


step 7 - importing other shaders

If a new shader is compiled after Houdini has been launched its .ds file must be loaded before it can be used in Houdini. Choose the Windows->Textport... (Houdini) menu item. Type the command,

dsreload

This will direct Houdini to reload the shader shader definitions from the SHOP directory.


Thanks to Jesse Kretshmer for the following notes.

To render with PRMan within Houdini:
1. At the SHOP level
The custom renderman shader will be found among Generators when creating a new SHOP type in Houdini. Add a SHOP for the custom shader.

2. At the object level
There must be a camera, at least one light, and a geometry object. Within the parameters of the geometry object there is a shading tab. The SHOP types for surface and displacement can be attached within this tab. Define the SHOP Surface or SHOP displacement field.

3. At the outputs level
Create a new "RenderMan" output operator. As with all Houdini output types, the camera will default to "cam1" if it exists, else this must be defined. Also, within the standard properties for the RenderMan output, there is an option to "Generate Script File". When this option is selected, it will generate a rib file and leave it unrendered. For a series of rib files, the output can use standard Houdini variables, for example, $HIP/test$F3.rib


© 2002-4 Malcolm Kesson. All rights reserved.