It is assumed the reader has installed Pixar's RenderManProServer and has followed the
"Cutter setup" and
"RenderManProServer setup" instructions.
By default, Cutter writes a slim file for each shader it compiles.
As shown below (emit slim doc) auto-generation of slim
files can be turned off. Slim files are only relevent if you intend to use your
shaders with Pixar's RenderMan for Maya.
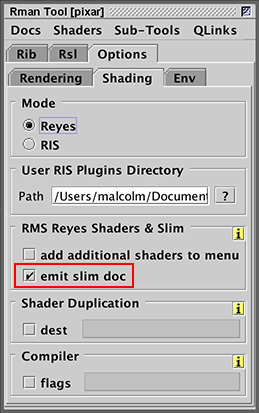
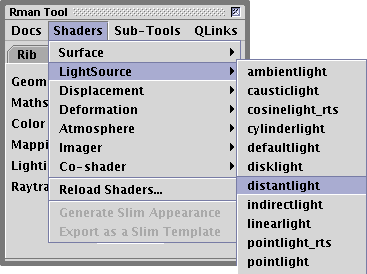
Figure 1
If your shaders will be used with Side Effects Houdini, "Output to Houdini
OTL" should be activated and a path should be set to a shared OTL file.
Edit->Show Preferences->Rman->User->Output to Houdini OTL
If the
path is left empty Cutter will create a OTL file for each shader it compiles.
Initially, Cutter will indicate the file does not exist ie.

Figure 2
Activating OTL output.
Ignore the warning. The path will change from red to black once the OTL is created.